

Feb . 13, 2025 14:26 Back to list
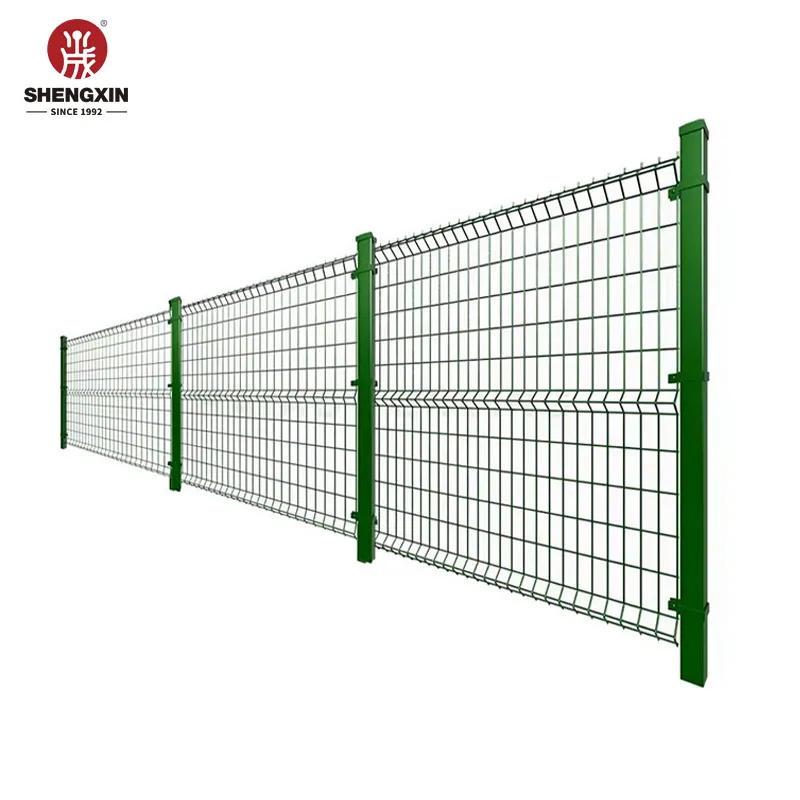
3d curved welded wire mesh fence panel
Navigating the intricacies of installing a 3D fence panel system can be a game-changer for both residential and commercial properties. As someone deeply rooted in the realm of home improvement, I am thrilled to share an authoritative, practical guide on elevating your property’s security and aesthetic appeal through 3D fence panel installation.
Why Choose 3D Fence Panels? The choice to implement 3D fence panels goes beyond mere aesthetics. These panels offer enhanced durability, withstanding high-impact situations thanks to their robust construction. Their innovative design allows for increased visibility, serving as a deterrent to potential intruders. Additionally, the maintenance costs are relatively low due to their resilience against environmental factors. Expert Recommendations Invest in Professional Installation While DIY enthusiasts may relish the challenge, enlisting professional help ensures that standards are met. Experts can provide insights and warranties that safeguard your investment. Legal Compliance and Zoning Laws Fencing projects must comply with local regulations. Consult with local authorities or community guidelines to ensure your project meets all legal requirements, avoiding potential fines or mandatory alterations. Trust in Quality Assurance Opt for manufacturers who provide certification or standards compliance for their products. This guarantees that the material quality is superb, enhancing safety and performance. In the competitive landscape of property improvement, 3D fence panels are a sound investment for anyone prioritizing security and style. Their unique attributes make them a top choice, marrying design with function seamlessly. Through this detailed guide, the journey from conception to installation becomes a streamlined process, empowering property owners with the knowledge to make informed decisions.
Why Choose 3D Fence Panels? The choice to implement 3D fence panels goes beyond mere aesthetics. These panels offer enhanced durability, withstanding high-impact situations thanks to their robust construction. Their innovative design allows for increased visibility, serving as a deterrent to potential intruders. Additionally, the maintenance costs are relatively low due to their resilience against environmental factors. Expert Recommendations Invest in Professional Installation While DIY enthusiasts may relish the challenge, enlisting professional help ensures that standards are met. Experts can provide insights and warranties that safeguard your investment. Legal Compliance and Zoning Laws Fencing projects must comply with local regulations. Consult with local authorities or community guidelines to ensure your project meets all legal requirements, avoiding potential fines or mandatory alterations. Trust in Quality Assurance Opt for manufacturers who provide certification or standards compliance for their products. This guarantees that the material quality is superb, enhancing safety and performance. In the competitive landscape of property improvement, 3D fence panels are a sound investment for anyone prioritizing security and style. Their unique attributes make them a top choice, marrying design with function seamlessly. Through this detailed guide, the journey from conception to installation becomes a streamlined process, empowering property owners with the knowledge to make informed decisions.
Latest news
-
Decorative Metal Fencing 3D: Innovative Security and Style for Today’s World
NewsDec.03,2025
-
SH50 Profiled 3D Fence – Durable Industrial Security Fencing
NewsDec.03,2025
-
Professional 3d Fence Panel – Durable & Cost-Effective Security Fencing Solutions for Industry
NewsDec.03,2025
-
Durable 3D Bending Wire Fence | Reliable Industrial Wire Fencing
NewsDec.03,2025
-
Fence Panel Shape 3D: Global Insights, Applications, and Innovations
NewsDec.03,2025
-
3d Bending Curved Fence – Durable, Stylish, and Industrial-Grade Fencing Solutions
NewsDec.03,2025